What are IP Addresses?
An IP address, or Internet Protocol address, is a unique identifier for every device connected to the Internet. It consists of a sequence of numbers separated by periods, like 192.168.1.1, and facilitates communication between devices in a network. IP addresses are essential for sending and receiving data between servers, computers, and other devices on the internet.
IPv4 (Internet Protocol version 4) and IPv6 (Internet Protocol version 6) are two types of IP addresses. IPv4 is the most widely used type and has few addresses. At the same time, IPv6 allows for a much larger number of addresses and is being gradually adopted to accommodate the growing demand for IP addresses.
Your IP address is assigned to you by your internet service provider (ISP) and can be static or dynamic. Static IP addresses remain constant, while dynamic IP addresses may change periodically. In some situations, you might want to change your IP address, for example, to resolve network issues, bypass restrictions, or maintain anonymity while browsing the internet.
Why Change Your IP Address

There are several reasons why you might want to change your IP address. First and foremost, privacy concerns may prompt you to seek a different IP address. Changing your IP address can make it more difficult for websites or hackers to track your online activities and collect your personal information.
Another reason is to access geo-restricted content. Some websites and services might limit their content to users in specific countries or regions. By changing your IP address to one located in a different region, you can bypass such restrictions and gain access to content that might have been unavailable otherwise.
Avoiding IP-based bans or blocks is another reason to change your IP address. Sometimes, websites or online services may blacklist certain IP addresses due to misuse or violation of their terms and conditions. Changing your IP address can help you regain access to these blocked websites or services.
Additionally, changing your IP address may also help to improve your internet connection: If you’re experiencing network issues or slow connectivity, your current IP address may be experiencing increased traffic or technical difficulties. Changing your IP address can resolve these issues and potentially provide a faster and more stable internet connection.
Finally, enhanced online gaming experiences can result from changing your IP address. You might be experiencing high latency or poor server connections in online games due to your IP location. Changing your IP address to a better-suited location can lower your ping, reduce packet loss, and achieve better online gaming performance.
Use a VPN

One effective way to change your IP address is by using a Virtual Private Network (VPN). A VPN allows you to connect to the internet through an encrypted tunnel, ensuring your data remains private and secure. When you use a VPN, your online activities are masked by the VPN server’s IP address, effectively hiding your original IP.
Choosing the Right VPN
Selecting the right VPN for your needs is crucial. Consider the following factors when choosing a VPN:
- Privacy: Look for a VPN with a strict no-logging policy to ensure your data is not stored or shared.
- Speed: A fast VPN will minimize potential slowdowns while browsing the internet or streaming content.
- Server locations: A VPN with a wide range of server locations can provide more options for changing your IP address.
- Ease of use: Choose a VPN that is easy to set up and use across all your devices.
- Price: While some VPN services are free, they may be limited. Evaluate the cost and features of various VPN providers to determine which fits your budget and requirements.
Configuring Your VPN
Once you have chosen your VPN, the next step is to set it up on your device. Follow these steps to configure your VPN:
- Sign up: Create an account with the VPN provider, if required.
- Download: Download and install the VPN client on your device. Most providers offer user-friendly apps for various platforms like Windows, macOS, Android, and iOS.
- Connect: Launch the VPN app and connect to a server of your choice. This will change your IP address to match the location of the selected server. Depending on the provider’s server network, you can choose from different countries or cities.
- Verify: Check that your IP address has successfully changed by visiting a website like whatismyip.com or ipchicken.com.
Always connect to your VPN when browsing the internet to maintain your privacy and enjoy the benefits of an altered IP address.
Switch to a Different Network
Switching to a different network can be an effective way to change your IP address. If you’re using a Wi-Fi connection, try connecting your device to another Wi-Fi network available in your area. This can be a public Wi-Fi network at a coffee shop, library, or another location. When you connect to a different network, your device will be assigned a new IP address associated with that specific network.
You can try connecting to another router or modem if you’re using a wired Ethernet connection. This can be done by unplugging your Ethernet cable from the current router and plugging it into a different router or modem. Be sure to get permission before connecting to someone else’s network.
You can switch from Wi-Fi to your mobile data plan for mobile devices, which will also assign you a new IP address. To do this, go to your device’s settings and turn off Wi-Fi. The device will then automatically use your cellular data plan and obtain a new IP address. Remember that using mobile data may incur additional charges, so monitor data usage if you choose this option.
Another option is using a Virtual Private Network (VPN) service. VPNs allow you to access the internet through a secure connection and, in many cases, will change your IP address to one of their own. There are numerous VPN services available, both free and paid. Some popular options are NordVPN, ExpressVPN, and Surfshark. When selecting a VPN, consider its privacy policy, speed, and number of server locations.
Try these methods in isolation or combination to switch to a different network and change your IP address.
Contact Your Internet Service Provider
Reasons to Contact ISP
There are several reasons you may need to contact your Internet Service Provider (ISP) to change your IP address. These may include:
- Security concerns: If you suspect that your IP address has been compromised or you are a victim of targeted cyber-attacks, contacting your ISP can help you get a new IP address for improved security.
- IP bans: Some websites or services may block your IP address for various reasons. Contacting your ISP can help you change your IP address and regain access to the blocked websites or services.
- Network issues: If you face persistent issues related to slow internet speeds or connection stability, your ISP can assist by assigning you a new IP address, which might resolve the issues.
How to Contact ISP
To contact your ISP for IP address change, follow these steps:
- Find your ISP’s customer support: Look for your ISP’s customer support number or email address on their website or a recent billing statement.
- Prepare your account details: Before making the call or sending an email, gather the necessary information, such as your account number, username, and address, to help the support representative identify your account quickly.
- Explain the issue: Clearly describe your IP address problem and why you need a new IP address.
- Request a new IP address: Politely ask the customer support representative if changing your IP address is possible.
- Follow instructions: The support representative might give you instructions on how to make the change yourself or may perform the change on their end. Follow their instructions to complete the process.
Use a Proxy Server
A proxy server acts as an intermediary between your computer and the internet. It allows you to browse the web anonymously by masking your real IP address with a different one. Let’s explore the world of proxy servers in more detail.
Types of Proxy Servers
Several types of proxy servers are available to users, each with its advantages and disadvantages. Some common types include:
- HTTP Proxy: These proxies are designed for web traffic and are commonly used to bypass geolocation restrictions, such as when accessing a streaming service from another country.
- SOCKS Proxy: A more versatile option, SOCKS proxies can handle various types of traffic, including HTTP and FTP, but might be slower than HTTP proxies.
- Residential Proxy: These proxies use real IP addresses assigned to residential users by an Internet Service Provider (ISP). They offer higher levels of anonymity and are harder to detect.
- Transparent Proxy: These proxies do not hide your original IP address and are used for caching purposes at a company or network level.
Setting Up a Proxy Server
Setting up a proxy server on your computer is relatively simple. Here’s a quick step-by-step guide for Windows users:
- Open the Control Panel and navigate to the Internet Options.
- Click on the Connections tab and then click LAN settings.
- In the Local Area Network (LAN) Settings window, check the box marked Use a proxy server for your LAN.
- Fill in the Address and Port fields with the appropriate information for your desired proxy server. You can find this information from a proxy server provider or by searching for free proxy servers online.
- Click OK to save your settings and close all open windows.
Keep in mind that using a proxy server can also have an impact on your browsing speed and might not provide the same security and privacy features as a VPN (Virtual Private Network). However, they do offer an excellent way to change your IP address easily and quickly.
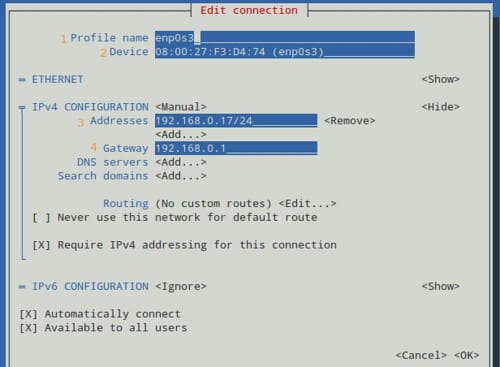
Modify Network Settings Manually
In this section, we will discuss how to modify your network settings manually to change your IP address on both Windows and Mac systems.
Windows Method
To change your IP address on a Windows system, follow these steps:
- Press
Windows + Ion your keyboard to open the Settings app, or click on the Settings button from the Start Menu. - Select the Network & Internet category.
- On the left sidebar, choose your network type, either Wi-Fi or Ethernet.
- Click on Change adapter options.
- Right-click your network connection and select Properties.
- Double-click on Internet Protocol Version 4 (TCP/IPv4).
- Choose Use the following IP address and enter a new IP address, Subnet mask, and Default gateway.
Make sure to use valid IP addresses and subnet masks for your network. Once done, click OK to apply the changes.
Mac Method
On a Mac, follow these steps to change your IP address:
- Click the Apple menu, then navigate to System Preferences > Network.
- Select the network connection you want to modify from the list on the left.
- Click the Advanced button.
- Go to the TCP/IP tab.
- Change the Configure IPv4 option to Manually.
- Enter a new IP address, Subnet mask, and Router (gateway) address.
Again, ensure you’re using valid IP addresses and subnet masks for your network. Once completed, click OK and Apply to save the changes to your network settings.