What is Android Rooting?
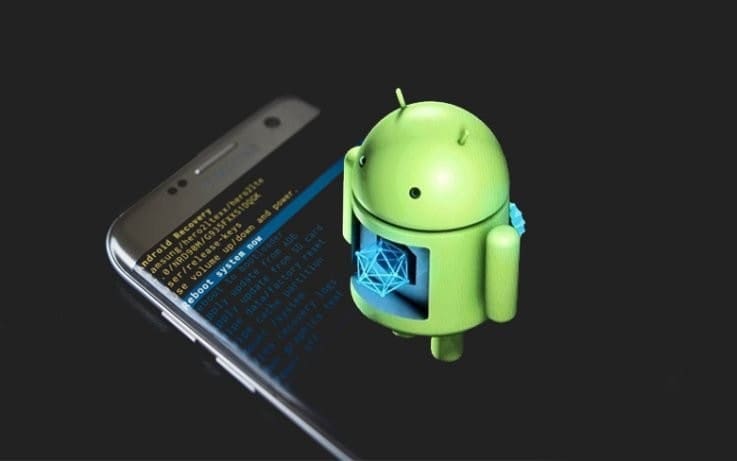
Android rooting is a process that grants you unrestricted access to your Android device’s system files. This allows you to modify, delete, or change your device’s settings and features according to your needs. As an Android user, you may appreciate the platform’s customization and flexibility, which rooting further enhances.
When you root your Android phone, you gain enhanced privileges, such as running apps like Wireless Tether or SetCPU. Rooting is similar to jailbreaking on iOS devices, as both processes aim to bypass limitations imposed by the manufacturer and give users greater control over their devices.
However, please note that rooting may create potential security risks and could void your device’s warranty. So, it’s essential to weigh the pros and cons before you decide to pursue rooting. Some benefits include increased customization options, improved battery life, and higher performance. On the other hand, the risks involve potential loss of personal data, vulnerability to malware, and the chance of bricking your device if something goes wrong during the rooting process.
To root your Android device, you’ll need to follow specific steps, which may vary depending on your phone’s model and manufacturer. The process could involve unlocking the bootloader, flashing a custom recovery, and installing a SuperSU app. Always research your specific device and create a data backup before rooting.
Precautions Before Rooting
Before you decide to root your Android device, you should be aware of the potential risks and consequences involved. This process is not for everyone, and taking necessary precautions beforehand can help you make an informed decision and avoid unfortunate outcomes.
First, back up your data. Rooting your device can occasionally lead to data loss, so you must ensure all your important files, contacts, and applications are backed up to a secure location, such as an external storage device or cloud service.
Make sure you fully understand the process and terms involved in rooting. Familiarize yourself with essential information such as manufacturer, carrier, Android version, model number, kernel number, and build number of your device. This will help you choose the appropriate rooting method and avoid compatibility issues.
Research the benefits and downsides of rooting your Android device. While it can offer increased customization options and the ability to remove bloatware, it may also make your phone vulnerable to security threats and void the warranty. Weigh the pros and cons before making a decision.
Always use a reputable and trusted rooting method. Many websites and forums offer rooting tutorials, but be cautious about the ones you choose. Look for guides with positive feedback from users who have successfully rooted the same device model as yours. This can help ensure a smoother and safer rooting experience.
Finally, remember that rooting is a potentially risky process and may result in an unresponsive or “bricked” device. Suppose you are not confident in your technical abilities or unsure about the risks. In that case, it may be best to consult with a professional or explore non-rooting methods for enhancing your phone’s performance and customization options.
Choosing the Right Tool to Root

When rooting your Android device, selecting the right tool is essential. Many options are available, but not every method works for every device. In general, there are two categories of tools you can use: command line tools that require a connection between your Android device and your computer and one-click applications that allow rooting directly from your device.
For those comfortable with more technical processes, you can use command line tools. Popular options include ADB and Fastboot. To use these, you’ll need to download and install the Android SDK on your computer, connect your device via USB, and input commands to grant root access. This method offers a higher level of control and customization, but it also has the potential to cause issues if not done correctly.
If you prefer a simpler, more user-friendly approach, one-click rooting applications are ideal. Some of the most widely-used apps are KingRoot, KingoRoot, OneClickRoot, and Towelroot. These apps involve just a few simple steps. First, download and install the app on your Android device. Make sure to enable installation from unknown sources in the security settings, as these apps are unavailable in the Google Play Store. Once installed, follow the on-screen instructions to gain root access. Remember that not all one-click root apps are compatible with every device, so it’s essential to research the best option for your specific model.
In both cases, it’s crucial to backup your data before proceeding with the rooting process. This ensures that your important files and information are safe if something goes wrong during the procedure. Additionally, remember to research the specific steps and requirements for your particular device, as they may vary.
Lastly, take advantage of online resources such as the XDA Developers Forum, where you can find valuable information, advice, and tips from experienced users who have rooted their devices. By taking the time to select the right tool and thoroughly prepare, you will be well on your way to successfully rooting your Android device.
Step-by-Step Guide to Root Android

Before proceeding with the following steps, remember that rooting your Android device may void its warranty and carries some risks. Only proceed if you’re confident in your abilities and understand the potential consequences.
1. Prepare your Android device: First, ensure your Android device has at least 80% battery life and is connected to a stable Wi-Fi network. Backup any important data, as rooting may lead to data loss.
2. Enable USB debugging: On your Android device, go to Settings > About phone > Software info > Build number, and tap on the Build number several times until you see “you are under developer mode.” Go back to Settings > Developer options, and toggle on USB debugging.
3. Download a suitable Android root application: There are several one-click root apps available, such as KingoRoot, KingRoot, and OneClickRoot. Select the most compatible with your device and download it to your computer or directly to your device.
4. Install the root application on your device or computer: If you have downloaded the application on your computer, connect your device to the computer via a USB cable and install the application on your device.
5. Launch the root application and begin the rooting process: Follow the on-screen instructions provided by the root application. This may involve a single tap to root your device or a series of prompts to proceed through the rooting process.
6. Monitor the rooting progress: The process may take a few minutes. Wait patiently while your Android device is being rooted. The application will inform you once the rooting is successful.
7. Install a root management app: After successfully rooting your device, install a root management app like Magisk to manage your rooted Android phone or tablet effectively.
8. Reboot your device: Finally, reboot your device to ensure all changes take effect and enjoy your newly rooted Android device. Remember that with root access, you’ll have more control over your device but also more responsibility. Be cautious when modifying system files and settings.
Troubleshooting: Common Issues and Solutions
Problem: Unable to root your Android device
If you are having difficulty rooting your Android device, it might be due to the complex process. To make it easier, you can use a root app to root your device with a single tap. There are many root apps, like KingoRoot and One Click Root, available to simplify the process.
Problem: Device is rooted, but experiencing issues
Sometimes, after rooting your device, you may encounter performance issues, or your device may not function as expected. In this case, it’s a good idea to unroot your device temporarily to diagnose the problem.
To unroot your device, follow these steps:
- Open your root app (such as SuperSU).
- Scroll down to ‘Full Unroot’.
- Tap and confirm if prompted.
- Your device will now be unrooted.
Remember that if you are still experiencing issues after unrooting, you can try factory resetting your device. Be aware that factory resetting will lead to data loss of images and contacts stored on the phone.
Problem: Connectivity issues after rooting
If you find that your Android device is having trouble connecting to a network after rooting, you can try multiple solutions:
- Toggle Airplane Mode on and off.
- Restart network connections.
- Restart the device.
- Adjust the settings.
- Update the device.
- Move closer to the connection source.
Remember to reboot your device before applying other troubleshooting steps, as this can resolve common issues.
Problem: Google Play Store crashes after rooting
If the Google Play Store keeps crashing after rooting your Android device, the problem may be due to a corrupt cache. To clear the cache, follow these steps:
- Go to ‘Settings’ > ‘Applications’ > ‘All Apps’ > ‘Google Play Store’.
- Tap on ‘Storage’.
- Select ‘Clear Cache’.
By clearing the cache, you should be able to resolve the crashing issue and continue using the Google Play Store.
Advanced Tips for Rooted Android Devices

Now that you have successfully rooted your Android device, you can unlock even more capabilities and customization options. Here are some advanced tips to help you get the most out of your rooted device:
1. Install custom ROMs: A custom ROM is a modified version of the Android OS that can come with additional features, performance improvements, and visual enhancements not available in the stock OS. Popular custom ROMs include LineageOS, Paranoid Android, and Resurrection Remix. Research which ROM is the best fit for your device and follow the installation steps.
2. Optimize performance and battery life: Rooted devices can access powerful system-level tweaks and apps. For instance, you can use the Greenify app to identify and hibernate power-hungry apps. Another app, Kernel Adiutor, lets you fine-tune CPU and GPU settings for better performance.
3. Block ads across your device: With root access, you can install system-wide ad blockers like AdAway, which blocks ads on all apps and websites. This will provide a clean, clutter-free browsing experience and help save data.
4. Automate tasks and functions: Automate your device’s tasks using powerful apps like Tasker, which allows you to create custom profiles and actions. For example, you can automate your device to switch to silent mode at work or turn off the screen when you put it in your pocket.
5. Customize the user interface: Give your device a fresh look by applying custom themes, fonts, and icon packs. With root access, you can modify system apps’ appearance, navigation bar, lock screen, and more.
Remember, while these advanced tips can greatly improve your device’s capabilities, they also carry risks. Always ensure you understand the modifications you’re making and back up your data before embarking on any major customizations.
Frequently Asked Questions About Android Rooting
What is Android rooting?
Rooting your Android device means gaining root access. This provides you with enhanced privileges, allowing you to run apps that require greater control over the system, such as Wireless Tether or SetCPU.
What are the benefits of rooting?
Rooting your Android device unlocks its full potential by granting you more control over the phone’s features, customization, and flexibility. You can install custom ROMs, remove pre-installed apps, improve the device’s performance, and customize its user interface.
What are the risks associated with rooting?
Rooting your device comes with some security risks. It can expose your device to malware or other security threats and might void its warranty. Additionally, if not done correctly, it could brick your device, making it unusable.
How do I root my Android device?
Rooting your Android device varies depending on its make and model. Generally, you’ll need to unlock the bootloader, install a custom recovery, and then flash a rooting software. This requires necessary drivers, compatible rooting software, and a compatible device.
Can I unroot my Android device?
Yes, you can unroot your Android device if needed. Unrooting can be done by flashing a stock ROM or using an unrooting app, depending on the specific rooting method you initially used.
Remember that rooting your Android device comes with risks, but it can also provide beneficial features and customization options. Always research and follow proper procedures to ensure a successful and safe rooting experience.
